

|
|
|
|
|
|
|
|
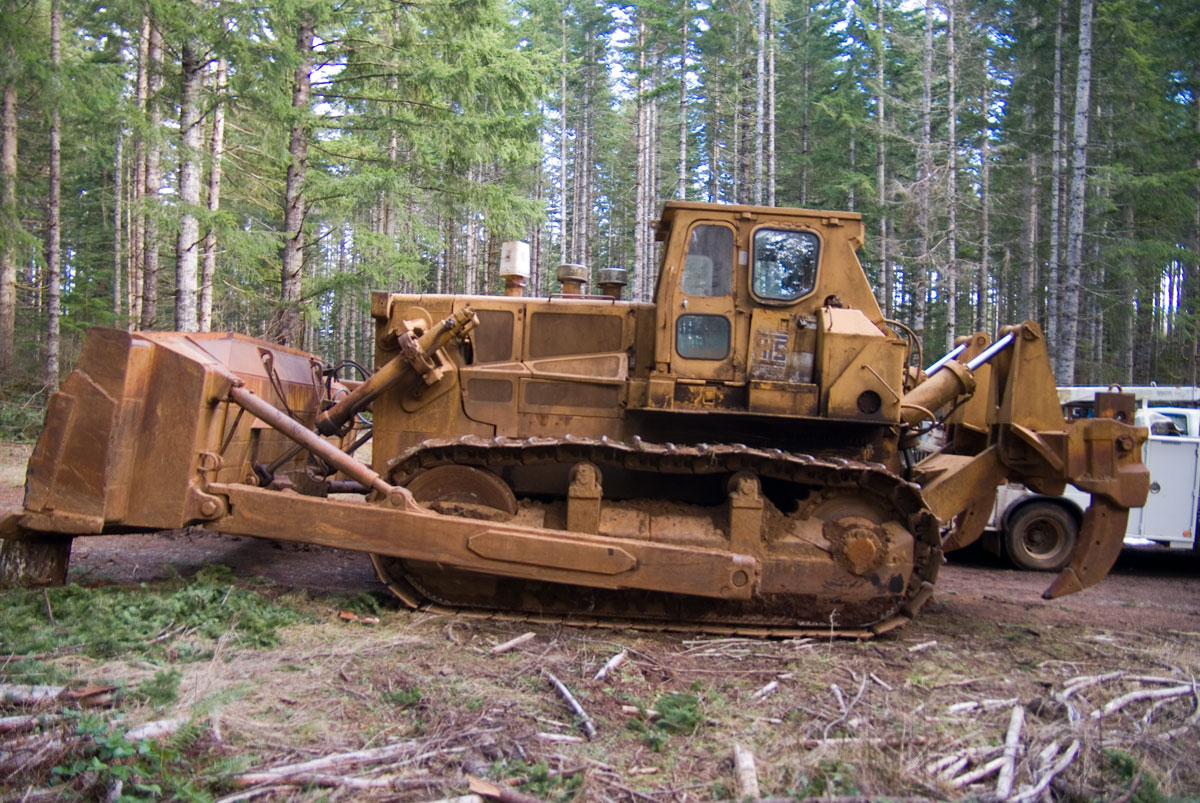
Every logger needs to have a dozer around just in case something needs shoved. This high performance Fiat Allis 31 features a 425 Horsepower Cummins KT1150 engine. The working weight is around 70 tons, and the blade is 18 feet wide. As with anything that weighs 70 tons and is 18 feet wide, moving it is not easy, but with the blade off, the width becomes reasonable and it can be hauled without further dismantling if you can get enough permits. Smaller dozers are more popular in applications where they must be moved a lot for obvious reasons. It was manufactured by what is was known as FiatAllis North America although they no longer market a machine this large in North America. This particular machine was manufactured about 1980 and spent much of its younger life in Montana, likely working in a strip mine.
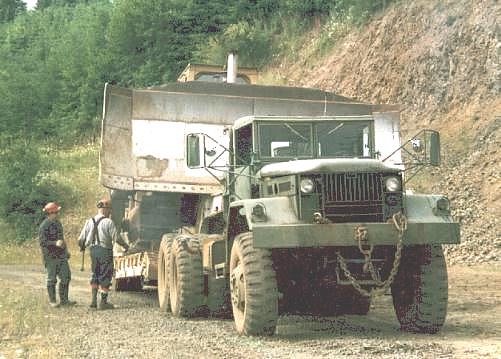
This machine is nearly twice as large and powerful as a classic D-8 Cat, and it will produce amazing volumes of rock even in conditions where a D-8 is unable to dig it. Blasting in rock is in disfavor for a number of reasons, and larger, heavier machines will dig successfully in harder rock than lighter ones. The FA31 is shown here on the left 'on the move' resting comfortably on a 70 ton General Lowboy under tow by an Army surplus off highway tractor
The FiatAllis 31 is a cut down version of the FA 41 which was the world's first successful production dozer of over 500 H.P. Most parts are shared with its larger brother. Key differences are that the 31 has one less roller in each trackframe and has an Cummins KT1150 engine (an In line 6) instead of a V1710 ( a V-12 engine configured at 525 H.P. ) Also the standard track pads on the 31 are 4 inches narrower than those of the 41. These changes mean essentially that the 31 is a 41 with about 15 tons of weight trimmed and a smaller engine, which in turn implies that these machines have a very good reliability record. The reason for this is that the big maintenance items on dozers are undercarriages, final drives and drive train components, which in the case of the 31 were all designed for a heavier more powerful machine.

|
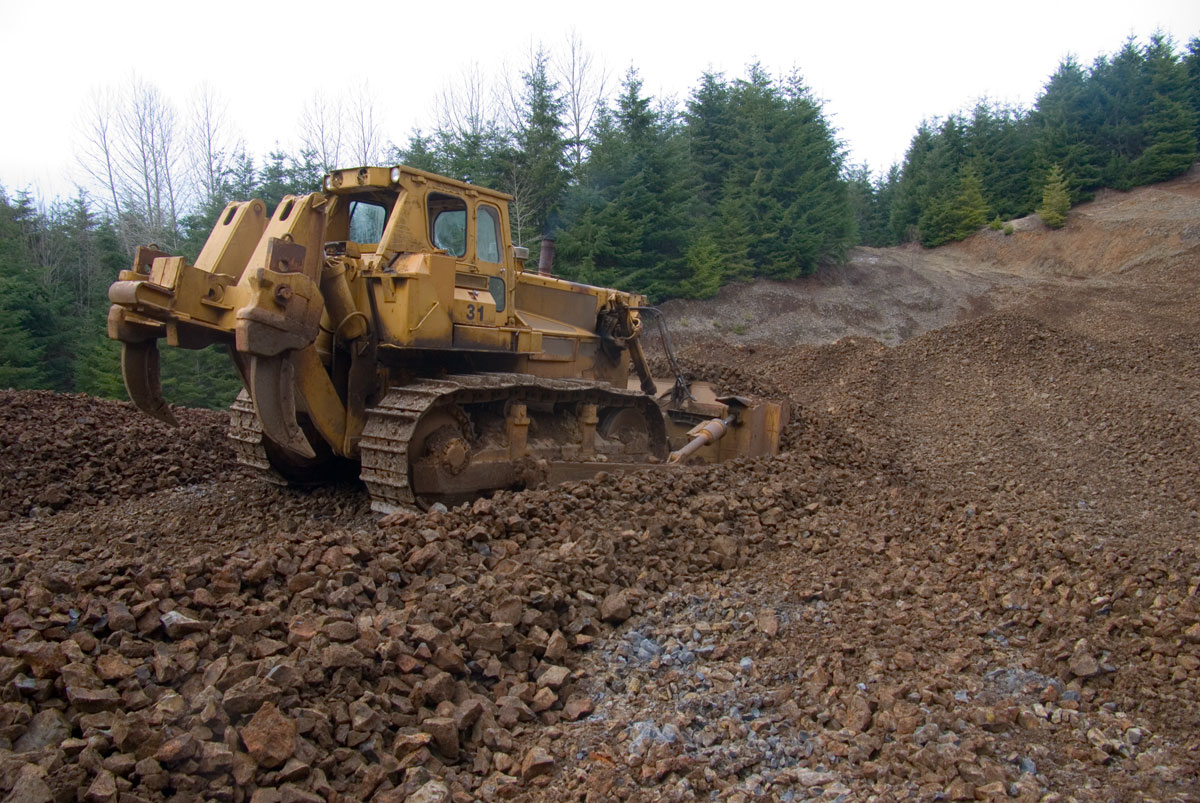
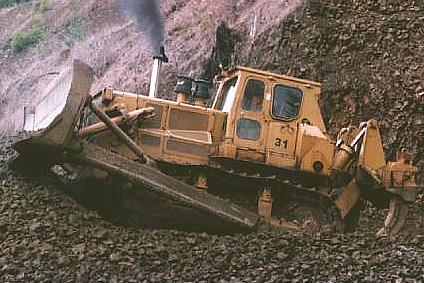
| FA 31 at work |
This machine is at home where it has a big place to work. Capable of moving several hundred yards per hour the FA 31 is shown here working in a low grade basalt deposit. The rotten basalt which obviously has a lot of dirt in it is suitable for making a base for forestry roads. As with any dozer, productivity is maximized when a moderate downhill push is available. You don't want it so steep that it is a struggle to back up, but steep enough that gravity enhances your pushing power.
|
If you have ever wondered about the fuel mileage on one of these critters, wonder no more. When seriously occupied, this dozer will consume about 20 gallons of diesel per hour. If you figure its speed of a couple of MPH you can do your own gas mileage calculation. Oh Well. Internal combustion diesel engines of all sizes are quite consistent on their efficiency, and more power means more fuel. With a big dozer, however, it clearly means that you need efficient logistics for refueling. In Rock digging the fuel consumption is very consistent day after day and you clearly need 160 gallons after an 8 hour shift. In as much as the typical pickup fuel tank that loggers tend to have in their pickups holds around 100 gallons you can get a bit of a clue as to the logistical problem of using this machine all day after day.
With a large dozer, however, it is the production side you are looking at. We've spent more than a trivial amount of time with this dozer digging and stacking rock for logging roads and the like. the production volume is good. Based on our observations, we assume the blade will hold and push around 20 yards. (This seems conservative considering the blade is 18 feet wide and 7 feet high and you usually have rock rolling over the back of the blade). The amount of rock that you can actually dig and stack per hour obviously varies with how hard the rock is, but 200 yards per hour seems to be a good minimum figure. If you can get the ripper in the ground you should be able to achieve at least this, and can probably achieve double that if little or no ripping is required.
The artwork in working rock with a dozer is identifying rock that you can work and rock that you can't work. The typical rock formation in the Pacific Northwest is what is known as basalt. It is of volcanic origin and in its hardest form will be blue in color. The hardest formations of besalt shows characteristics similar to that of obsidian, and will fracture into slivers and other sharp objects. In its native formation, that rock tends to be a non fractured monolith. It is not rippable. Basalt, however softens with age and weathering (over millennia) and there are frequent formations in the Pacific Northwest which are weathered and fractured to the extent that it has black seams in it. These formations will vary widely and are usually not quite hard enough to meet federal specifications for 'highway construction aggregate" or concrete rock, but it can be usually readily produced for logging road construction. When dug, a fair amount of it will break into 'fines' which is a big pain if you want to run it through a crusher, (because it turns to dirt and plugs everything up). However, if you want to spread the rock on the road as "pit run" as is popular, the fines provide a good binder to keep the rocks from rolling around once the rock is spread and compacted.

|
| Moving Out |
If you are wondering what one of these things sells for new, the answer is that FIATALLIS is no longer marketing machines in this size class in North America. To provide a clue though, The new 500 HP CAT D10R has a sticker price of around $750,000 while the D11R (770 HP) is priced at around 1.1 Million USD. Of course, the D10R is matched against the FA 41, in the over 500 HP class while the 31 is a cut back model.
See also Big Iron for other heavy machinery.
I often get questions from people looking for parts or wondering how you fix one of these things. Our family joke is that when you want to fix this thing you have to get up in the morning with determination. Actually the technology of repair isn't much different from watch repair other than the fact that you need larger tools. The side skirts on the engine house open to reveal a 6 cylinder Cummins engine, which though a series larger than is typical of heavy trucks (the K series), it is familiar looking at least to anyone who has seen a Cummins and has no real secrets which make it different from other Cummins. The 6 foot diameter cooling fan on the front might give your a start though. Like most turbocharged Cummins, it is not particularly noisy (at least compared to the classic 2 cycle Detroit Diesels which have the highest noise to diesel ratio in the industry.) On the back of the engine is a torque converter coupled to a transmission by a short drive shaft. The 3 speed powershift transmission is bolted to the rear end case and the pinion extends from it to drive the bevel gear. Unique to Fiat Allis is a drop out clutch in front of the converter. The shifting sequence releases the clutch in front of the converter so the machine can shift without engine power against the converter. This provides a smooth and relatively jerk free shift even if you inappropriately make the shift at full throttle. The brakes are spring set --hydraulic released, and when the pressure blows down to release the master clutch, it also releases the brake pressure setting the brakes. This is a useful safety feature in that the machine will not run away if the engine dies or loses transmission pressure. Instead the machine stops. There is cavernous area under the floor boards around the transmission. This doesn't really mean that it is easy to access everything though. Mostly it means that things are so far away you can't reach them. Under the seat there is actually a 'manhole' big enough to allow a small man to crawl right down in with the transmission. For major service the cab is hinged on the back and can be tilted away to provide access for work in the converter and transmission area. Underneath there is a massive belly pan which yields access to the converter area (and which allows you to stand up under the dozer and look at the front of the transmission. The double reduction final drives have both a small gear running on a bull gear in the classic design, but also inside the bull gear there is a further planetary gear reduction.
If you need to break a track, you gently slide the master pin out (with the help of a 100 ton port-a-power) and perhaps some heat and a sledge hammer, and lay the track chain out on the ground. Swing frame removal isn't much different from a small dozer. The sprocket has an outboard bearing bolted to swing frame, and the angle brace underneath is bolted up with 4 bolts just like many smaller dozers. some assistance here is an 1.5 inch square 3000 foot pound impact wrench and a socket set to 3 inches or so. The classic 1 inch drive impact wrench such as is often around to change truck tires and the like only kicks up 1000 foot pounds of torque and won't do much except make noise on bolts of this size. This also implies that your shop truck needs a real air compressor because these large impact wrenches use 25 or 30 CFM. We use a 2 stage 15 CFM compressor with a 60 gallon tank with satisfactory results. This, of course, won't sustain the wrench, but unless you are tougher than we are you won't mind resting up between bolts while the compressor catches its breath.
The entire sprocket, final drive, planetary assembly can be unbolted from the side of the rear end housing and removed from the dozer as a single unit, by simply breaking the track, unbolting the swing frame and jacking the dozer up about 3 and a feet so the bottom of the sprocket clears the top of the swingframe. The bolt circle for unbolting the final is accessible with a long extension through a small hole in the sprocket. The plan is for the sprocket to be rotated (with machine power) while the bolts are successively removed. This works quite well. Life is less simple if the machine is out of service or the final is lockup up and won't turn, though it is reportedly possible to get the bolts out with a slug wrench and a hammer.
|

|
Sooner or later you get to learn about other components. This year I got to learn about relining the brakes, and changing out the transmission. The brakes are bands inside the rear end case. The transmission is to be found by digging down about 3 feet straight below the operators seat. It bolts to the front of the transmission case and is connected to the converter by a very short driveline. The converter is on the back of the engine.
You need a good service truck with a hefty crane to get the job done. I used an 8000 lb. crane and that seems to be be the minimum. You begin by removing the cab. It will flip back for minor service under it, but my crane is barely long enough to flip it, and that doesn't solve the problem if you have to dig into the brakes or transmission as you have to take at least one of the rear mounts off that hold the cab. Unbolting the cab is best accomplished with a really big ( 1 1/2" drive) impact wrench. It is made to come off easily and isn't the biggest deal as there are few things connecting it to the rest of the machine as it is made for service.
After the Cab is off, if you are going for the brakes, you next have to remove at least part of the fuel tank guard, and then take off the fuel tank. It holds around 250 gallons of fuel and your crane will be happier if the tank is not full, though I have removed it full. Removal of the fuel tank exposes the deck over the steering clutches, brakes and bevel gear. There are deck lids for each steering clutch and for the pinion/bevel gear. The spring boxes which set the brakes upon loss of oil pressure are on top the deck plates along with a lot of plumbing. The spring boxes can be lifted off (with a crane) and then the deck plate can be removed (with a crane). The brakes are an external band with the ends attached to the bottom of the lid. IT is a 'jack in the box' to assemble though disassembly is easy. The brake bands pin to the bottom of the lid, and the lid needs to be in place to put the pins in, but of course the pins that hold it cannot be accessed without lifting the lid. The solution is of course that you can lift the lid a 'little bit', but for the most part a 'little bit' less than you would like to. Anyhow that is the general drill.
Changing out the transmission has some of the similar requirements. You don't have to take the fuel tank off to remove the transmission, but it has to be off for installation if you are going to check the backlash in the pinion gear because you have to do that down through the access lid in the top of the rear end case (under the fuel tank). You also get to remove the console which includes all the operator controls (shifter/steering clutch controls and a frame member) Next you get another frame member that the brake pedals mount on and alas you can see the transmission. The belly pans come off the bottom for access and you are ready.
There are about 20 or so hydraulic lines (mostly for test ports) to remove. Then you take out the drive line, the pumps off the back of the converter for clearance reasons, and then you unbolt the bolt circle that holds the transmission to the rear end case and lift it out. The bolt circle is accessible only with a half inch drive and the bolts are grade 8 and tight. You will be really happy if you have a 24" flex-handle for half inch drive. There are a couple of eyebolt holes in the top for your lifting eyebolts, and the transmission fits up out of the hole fairly cleanly, but it weighs around 4,000 lbs and if you don't have enough boom truck, you are screwed, as the dozer is so larger that you have to have the boom well out to reach over it. I quartered my service truck on the side of the dozer as close as I could get and pulled the outriggers all the way out and grunted a lot lifting it (with a snatch block of course). I have no idea what the smart guys think the time line for transmission removal should be, but with a mechanic and a helper, I was able to dig down to the transmission the first day, and tied the transmission on the back bumper of the service truck and hauled it off the afternoon of the second day. Re-installation is slower. I think somewhere around 30 hours for a mechanic and helper. A significant factor both ways for time is dealing the with the fluids. You have to drain and refill the hydraulic system, the rear end compartment and the transmission meaning you have to move around a 150 gallons of oil, and if you have to pump it all by hand......
The most technical aspect is checking the backlash in the pinion. This needs to be done because the pinion gear is on the transmission main shaft and the bevel gear is part of the rear end case. You can accomplish this with a couple of dial indicators and a pinch bar. You put one dial indicator on each gear, down through the top hole, and with the brakes released there is enough slack in the final drives to let you rock the bevel gear. The spec is .018" plus or minus .006". You rotate the bevel gear as far as you can one way, and then with the pinch bar rotate it the other way until the pinion begins to turn. If this is within the .012-.024" range you are a very happy camper. OF course if you don't release the spring set brakes, you are not going to rock the bevel gear at all. We were able to verify that the final drives had more slack than we needed for the test because we could rock the bevel gear far enough to make the pinion turn either way with a 30" pinch bar.