Pentax Macro Photography

|
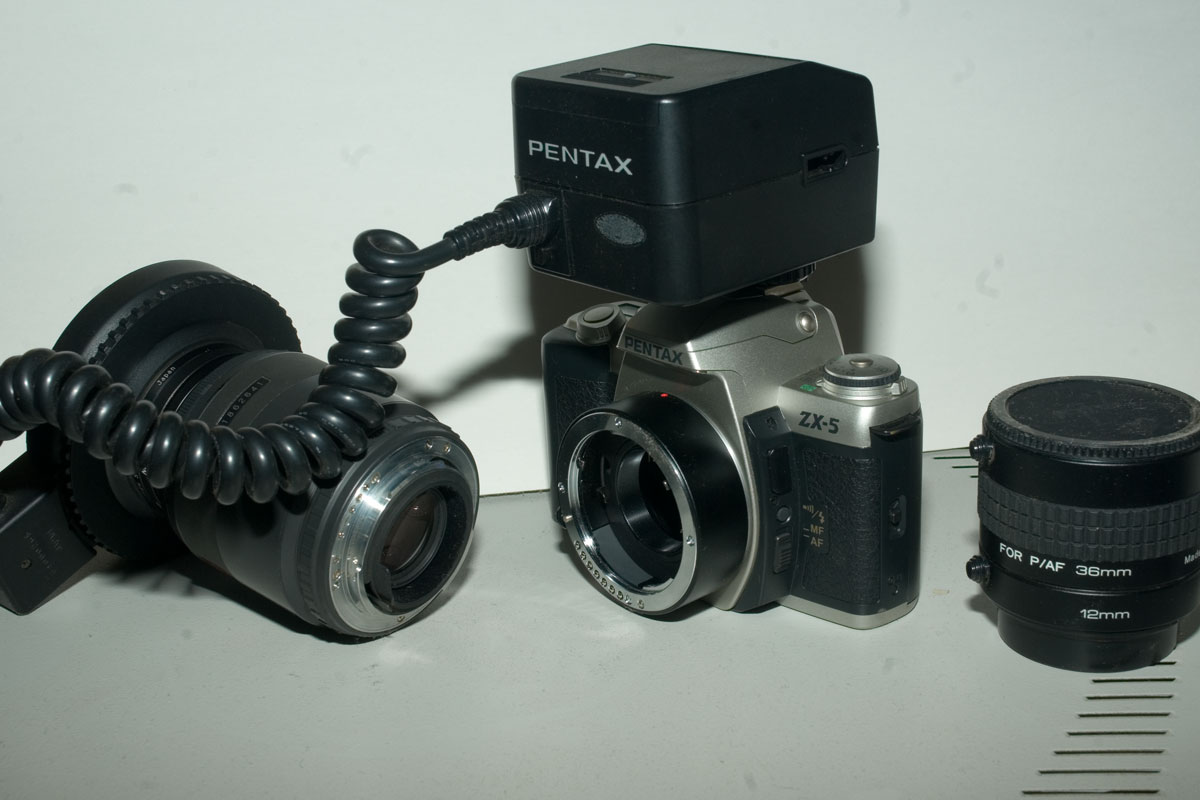
| Ringlite mounted |
|
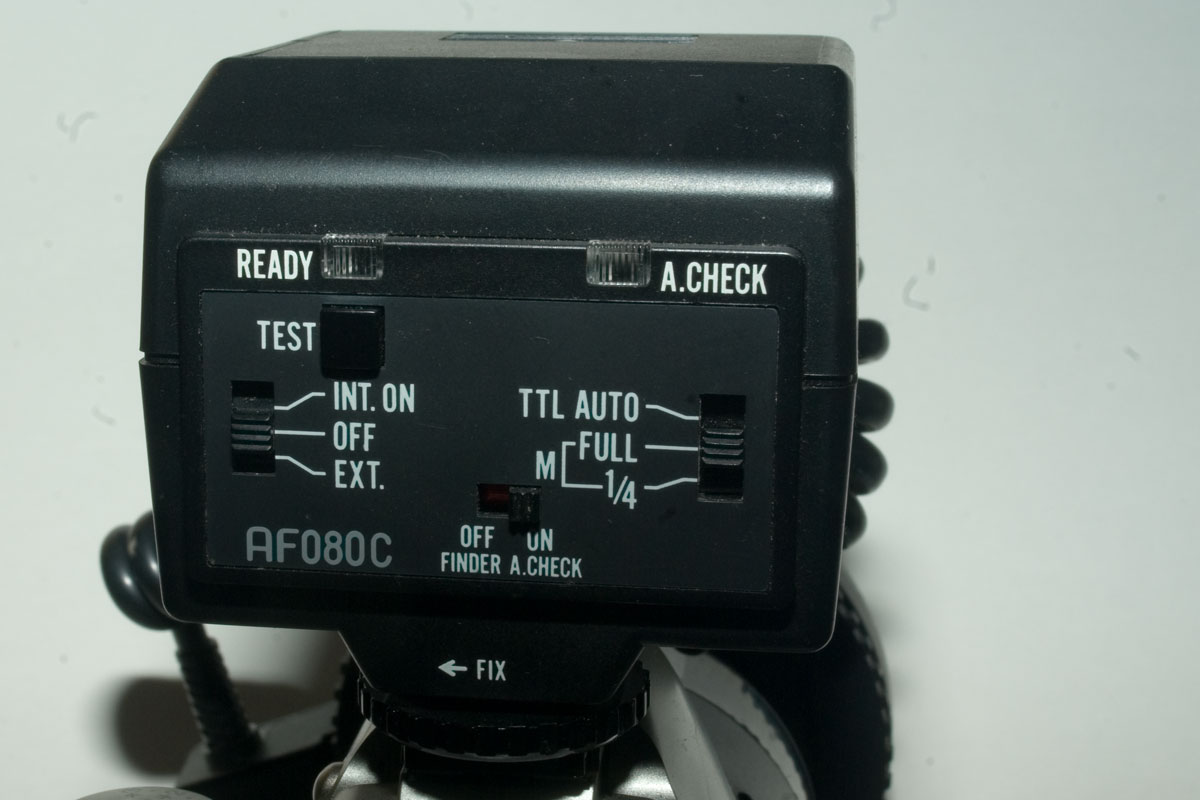
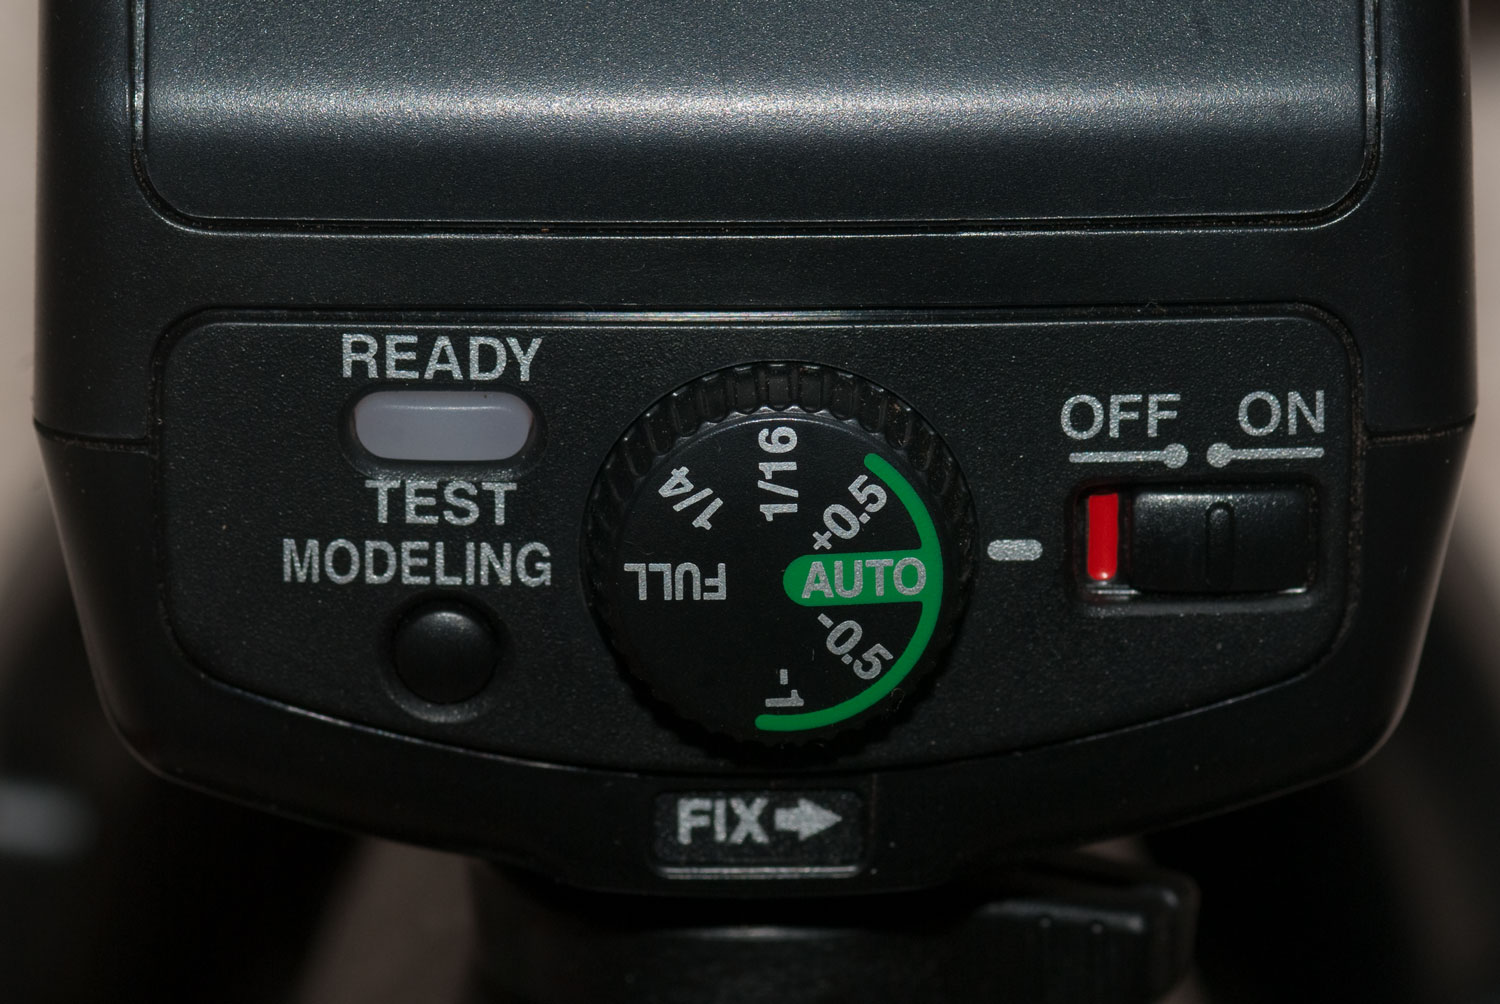
| Control Panel of AF080C |
| All photos with blue borders expand if clicked |
|
| 20 MM Tube on Body |
|

|
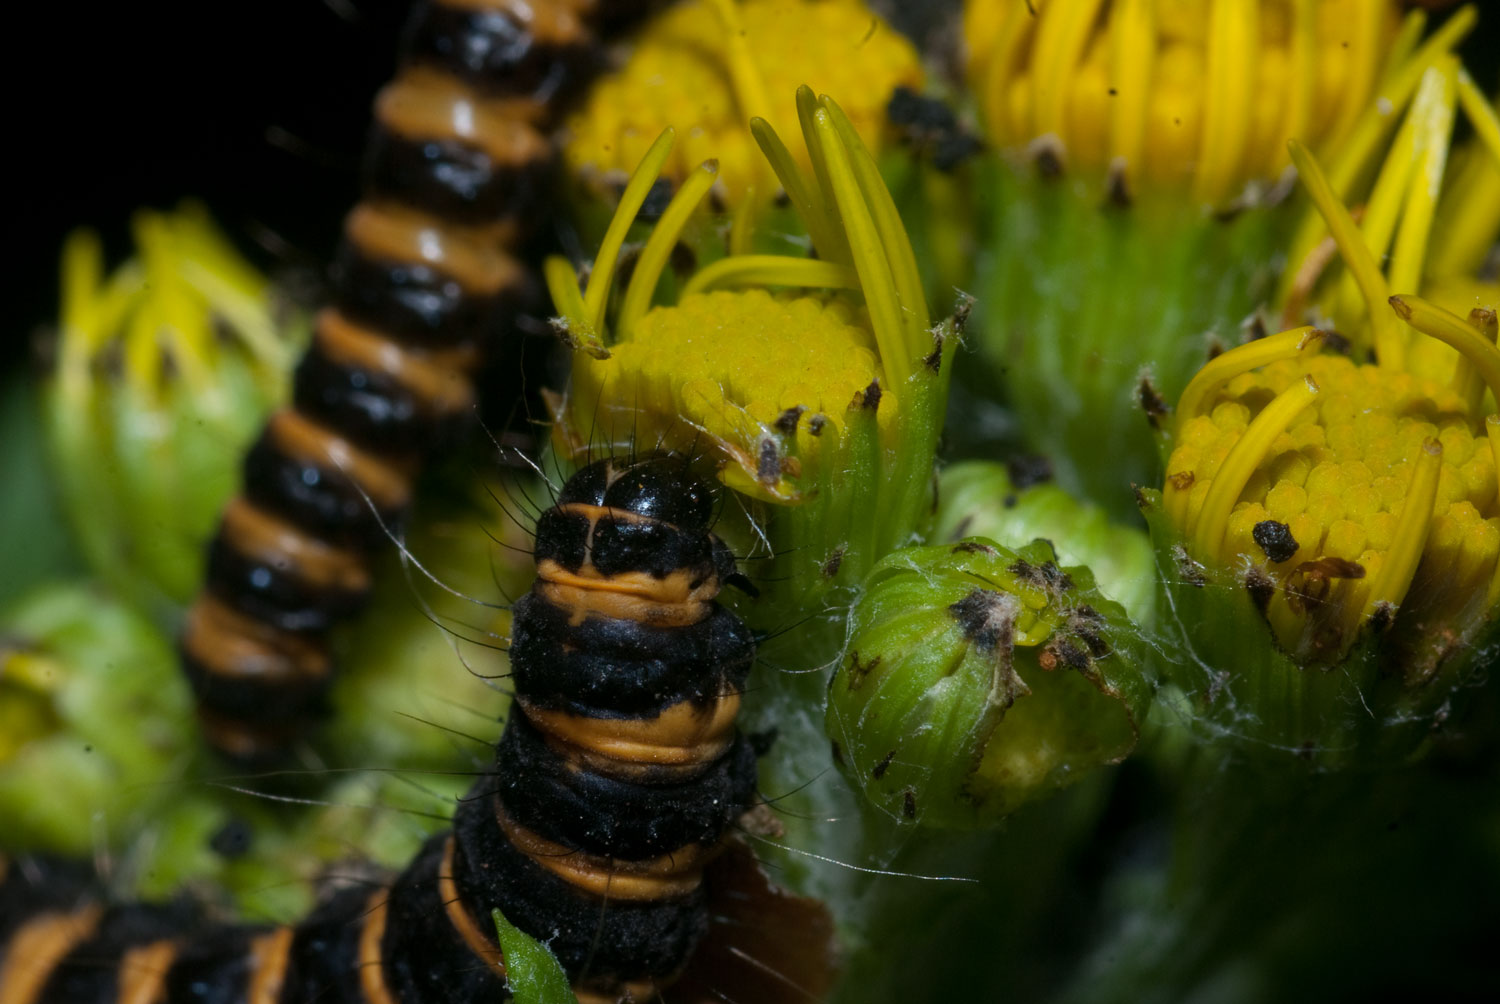
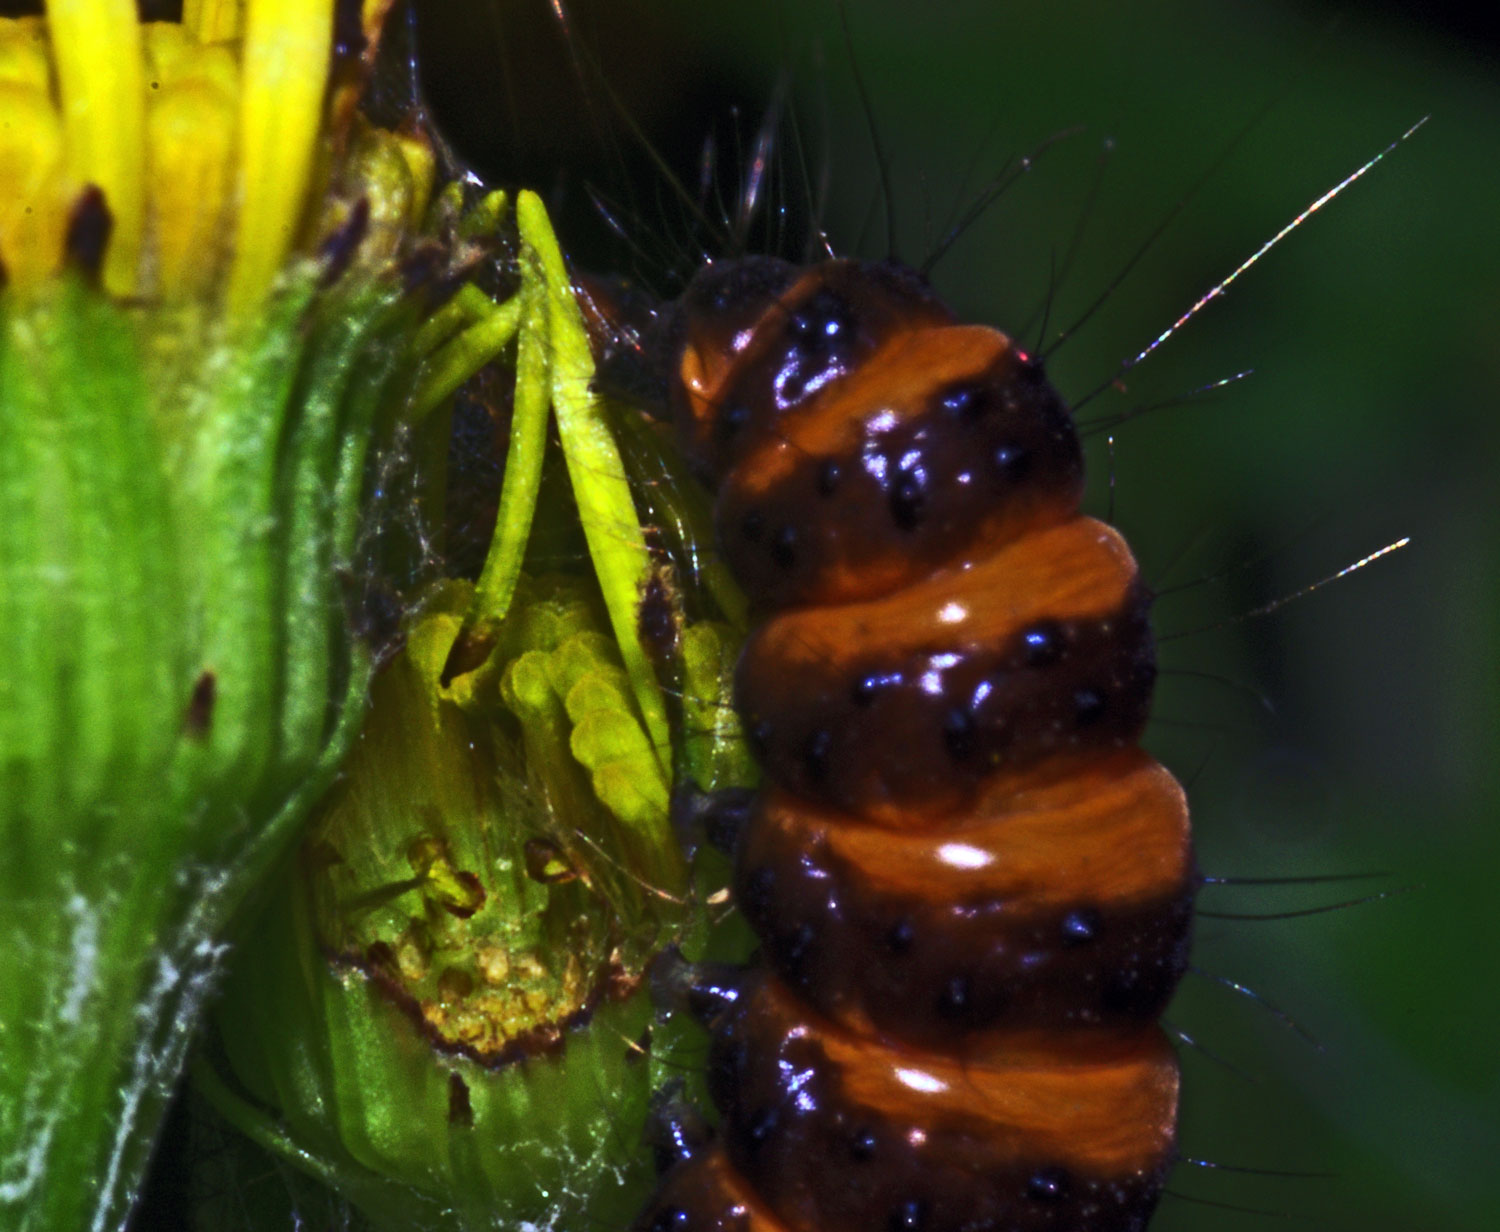
| Cinnabar moth (Tyria jacobaeae) larva |
|
| Cinnabar moth (Tyria jacobaeae) larva |

|
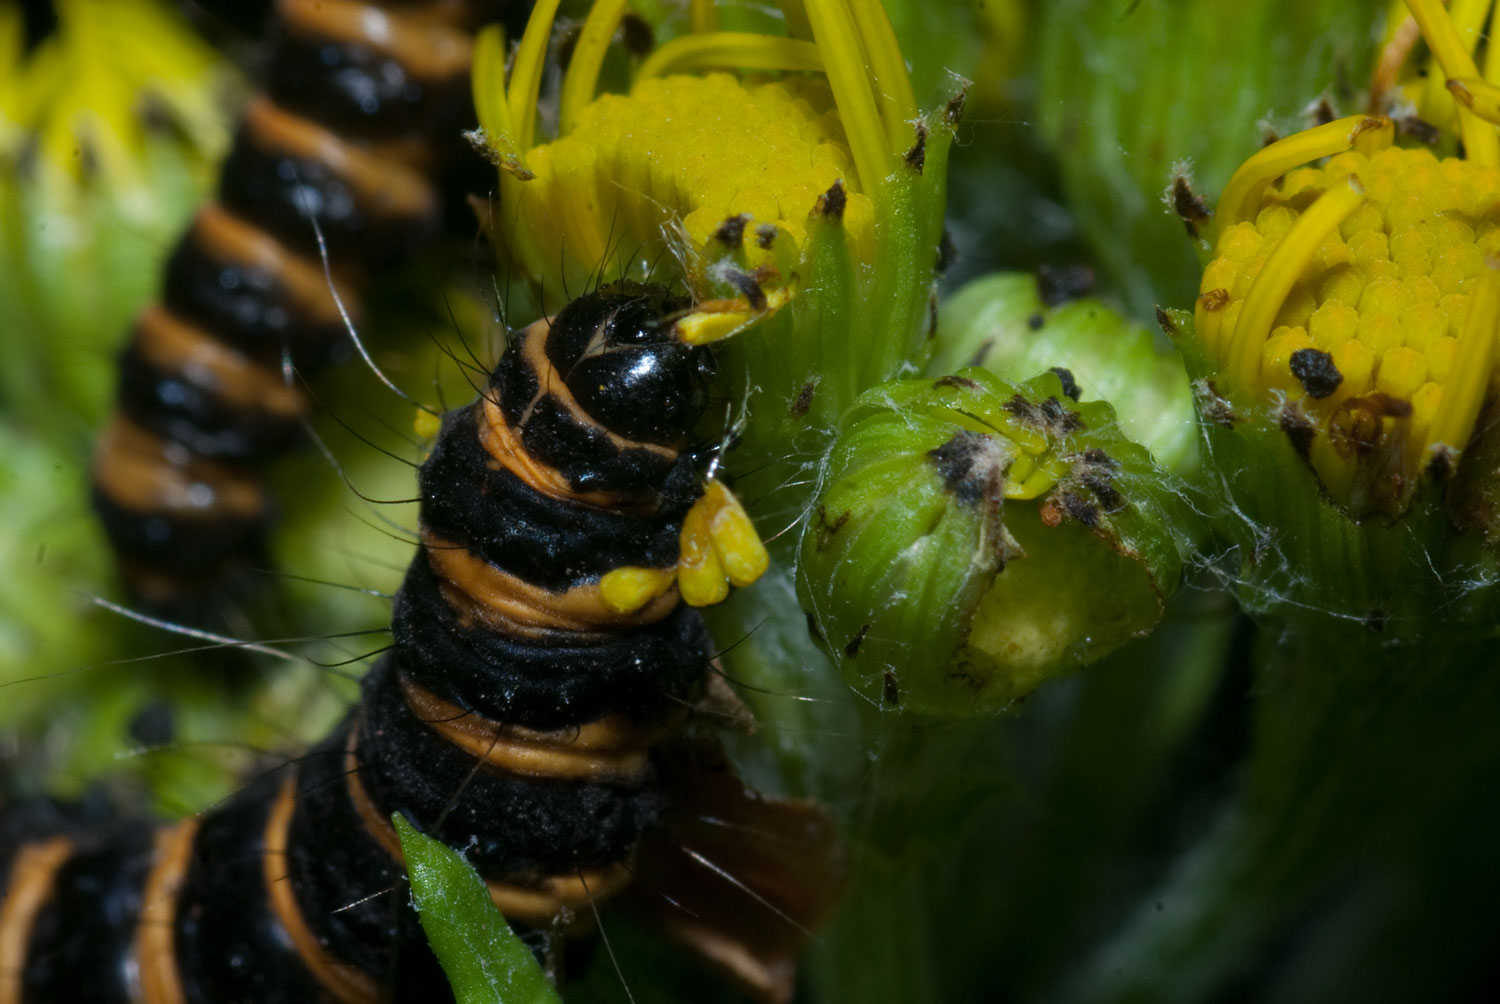
| Cinnabar moth (Tyria jacobaeae) larva AF360FGX |
|
| Cinnabar moth (Tyria jacobaeae) larva AF360FGX |
Macro photography is a big word for close-up photography. That is to say when you take photos and the resulting images, but not the negative or non-enlarged image is larger than real life. With common cameras and lenses objects generally need to be several feet away in order to be 'in focus' because the focus mechanism of the camera simply won't travel far enough for you to 'get closer'.
With an SLR type camera it is fairly easy to add equipment to allow really close focusing. The most common accessory is a 'Macro Lens'. The Pentax F 50 mm Macro is shown in the photo here and another macro lens appears on the "Pentax A" page. Although technically an auto focus lens, photographers almost universally turn the auto focus feature off for macro work because focus is too critical to be left up to a machine, and typical auto focus mechanism simply can't makeup their minds because the depth of field is so shallow that the photographer sort of needs to decide 'what' should be in focus, and the machines aren't very good at choosing the same thing you would choose, and often ignore the foreground that you are looking and and focus on the more dominate background.
Macro lenses have both optical and mechanical differences from regular lenses. The Mechanical difference is that the helicoid has much longer travel to allow the lens to move forward a serious distance. This allows you to focus on items that are only a inches from the front of the lens. It was typical of the older A series lenses to focus close enough to provide a 2:1 ratio. In the film context this means that a real life object that was 2 inches high would be 1 inch high on the negative. With the transition to auto-focus lenses, Pentax began making 1:1 macro lenses implying that you could focus closely enough that a 1 inch high object would be 1 inch high on the negative.
The optical characteristic of the Macro lenses is that they are specially corrected for close focusing and in particular are corrected for flatness of field, thus if you are photographing a document such as a postage stamp, you can get both the center and the edges in focus at the same time.
Of course, there are solutions to get even closer and to see even smaller objects. A traditional solution for this are 'extension tubes'. These are just a spacer that fits between the lens and the camera body that moves the lens forward. They were very common accessories until Pentax began making 1:1 macro lenses. As a set of 3 of these of varying length would allow you to extend a 2:1 lens forward enough to take a 1:1 photo, Pentax seemingly decided that they had met the macro needs by making the 1:1 lenses, and has never made an FA style extension tube. Even finding tubes that support the 'A' mount with the series of contacts on the flange is difficult but they exist or have existed as I have a Kenko set. The third photo down shows 1 extension tube on the camera body and two more sitting to the right. You can find pictures using this close up feature in the Native Plant Guide of this site. In particular give some attention to the small flowers.
Pentax AF080C Flash
The next issue that you come across in dealing with macro photography is the need for a flash. You find as you get really close, it takes a lot more light, and you also discover that depth of field disappears as well. Additionally a conventional flash unit isn't very helpful in lighting an object that is 3 inches from the front of the lens, most particularly if it is the built in flash or a shoe mounted flash.
Pentax has made two 'ring light' flash units over time to address these issues. The first of the pair is the AF080C which was made roughly during the decade of the 1980's, and a slightly more powerful unit called the AF140C which was manufactured subsequent to 1991. Both have TTL and Manual modes. The TTL is a Pentax shorthand for a fully automated flash mode which when combined with a camera body that also supported the TTL mode allowed you to simply install the flash unit and turn it on, and the camera would jump into the flash mode, making all necessary settings and finally adjusting the duration of the flash to provide a correct exposure. This worked with all Pentax SLR film cameras made after 1982 beginning with the Super Program (US) or Program A (world). The very first of the Pentax digital cameras also supported this mode, but alas Pentax has abandoned the TTL mode with more recent digital bodies (including the K series.) The simple reason is that the TTL mode relies on a sensor located inside the camera body to determine when sufficient light has arrived and then signals the flash to shut down. The K series digital camera bodies don't have this sensor and consequently will not work in an automated mode with any TTL flash unit, including the Pentax ring lights. Although the photos here show the ringlite modeled on a late model film body, my principal camera is a K10D (which I was using to take the photos which is why it wasn't used as the model. Unfortunately, the K10D is among those that no longer supports the TTL mode so to use the ringlight on the K10D you have to set the flash unit in the manual mode. Effectively you set the camera to the X sync on the mode dial, and using either full power or 1/4 power you turn the f/stop wheel until you get a proper exposure. For some of the very close range shots I've found that even with ISO 100 and f/32, I am still over exposing so I have resorted to adding ND (Neutral density filters) as needed to get the exposure range within the mechanical limits of the lens.
The ring light is a two piece affair with the batteries and the electronics in a unit that mounts on the shoe, with the actual light part screwing on the front a lens using the 49mm filter size. You will need an adapter if your lens has other than a 49mm filter thread. Pentax has produced flash units that work in an automated mode with their now supported "P-TTL" mode which isn't particularly helpful as there is no P-TTL ring light.
Update August 14, 2011
|

|
| PENTAX AF160FC Ring Flash |
Pentax has released a Macro Flash for the P-TTL technology used in all Pentax digital cameras. It is the Pentax AF160 FC Ring Flash. The familar TTL technology used beginning with the SuperProgram in the early 1980's through the demise of the film cameras adjusted the flash based on a sensor in the mirror box. Perhaps anticipating the end of mirror boxes, and the requisite place to mount the internal sensor, the P-TTL flash technology arguably takes a step backwards and does not support an internal sensor. In what is suppose to be an improvement, this technology adjusts itself based on a pre-flash. It is also customary for the flash units to have a focus assist light which will light up under extreme low light conditions to provide some light for the auto focus to function. The Digital camera bodies have such a light on the body, but the one on the flash unit takes over when an external flash is attached. The AF160FC ring flash has 4 LED's in the ring that light off to provide the assistance.
I have yet to buy one of these new ring flashes. By implication the new model is twice as powerful as the one that I have based on the Guide number. Some attention also has to be paid to the filter sizes. The AF080C presupposes that you have a 49mm filter thread on your lens. The Pentax SMC-A and older macro lenses mostly used this thread, but the F and FA lenses used a larger thread, (either a 52 mm for the 50mm Macro or a 58mm for the 100 mm Macro. the DA macros seem to be back to 49m.
Shown in the margins are photos of some Cinnabar moths feasting on Tansy Ragwort. I have found that I can take macro shots using the FA100 macro with the standard AF360FGZ flash with reasonable results. I have found that the flash exposure is best controlled by disabling the auto ISO function, and adjusting the flash using the Fn button on the K10D. Making the adjustment on the Flash unit by turning the exposure adjuster there doesn't seem to work.
Update August 30, 2011
I couldn't resist. Trying to use a regular flash didn't do much for me, and old flash on manual didn't do much for me so I bought Pentax's latest and greatest macro flash.
It comes with adapters to fit common Pentax macro lenses. The controls it seems are pretty simple. The auto mode determines whether your camera supports P-TTL or traditional TTL of the film days and behaves accordingly. There is also another switch on the ring that can be used to turn part of the ring off if you want to create some shadows. I generally run the lens toward f32 by turning a wheel and then fiddle some with the exposure to get it right. It's not as auto as one would imagine, but tweaking the exposure right isn't hard. It has plenty of power for the longer macro lenses such as the FA 100/f2.8 that I have. You can get too close for it to work right which you most always do if you add extension tubes for more magnification particularly with the 50mm Macro. My first impression is favorable, but it's not perfect.
Using the AF160 FC Ring Flash
The somewhat over priced Pentax Ring flash comes is a large leatherette case along with adapters for all the historically common Pentax macro lenses. This includes 4 adapters that will screw into various filter threads and one adapter that hooks on like a 'lenshood'. It doesn't take you long to figure out that the flash isn't very useful with the 50mm or less macro unless you are photographing fairly large objects. The reason is that the flash control technology has a minimum distance requirement in the range of 6 inches. The 50mm lens at high magnifications is simply too close to your subject for the exposure technology to work right. This limitation is documented in the manual backhandly, i.e. they tell you the minimlum working distance but don't mention that if you are using a 50mm macro you will probably be too close if you are pushing for maximum magnification or are using extension tubes.
The unit however is plenty strong enough to support the use of a 100 mm macro lens, and this lets you get significantly further away from your work---usually a good thing anyway, but if you only have a 50mm macro you are sort of screwed unless you are willing to manually adjust the exposure---which isn't too hard to do since you can with digital technology immediately review your results.
Additional information: see Wikpedia - Cinnabar_moth